

Don't let your web pages go staleSHORTY HTML


Samples;https://kviksajt.com?id=dictionary#FILES
Buttons;https://kviksajt.com?id=dictionary#FORMS
ARE YOU WILLING TO PAY FOR GOOD SERVICE?
I wish this hosting would be completely free of charge, and at the moment it is, but that is not very sustainable so I could charge for the service or finance it with ads. Nobody likes that solution. So if you want to take advantage of this great opportunity to make your web pages quickly and without frying your brain, then please make a donation so that the service can continue.
SAMPLES
The links go to some simple examples made in Shorty HTML
Sample 1;https://kviksajt.com?id=sample2
FILES AND FOLDERS
● Shorty-pages are normal text files named shorty.filename.
● There can be no spaces in shorty file names.
● The first page has the same name as your domain, shorty.yourdomain.
● Shorty is started with an index.html file which you download.
● The index.html file goes to the domain root, (C:/ on Windows).
● Or to a folder C:/yourdomain when your Shorty-pages are secondary.
● There must be a folder [yourdomain].
● In that folder goes the index-file and two other folders.
● A folder image and a folder sound.
● Images go to the image folder, sound files to the sound-folder.
● Duplicate the structure on your server and on your local computer.
● You edit your shorty-pages on your local computer.
● Pages which you edit have to be transferred to the server.
● That can be done automatically with FTP.
[+] Domain info
IMAGES ON YOUR PAGE
Adding images to the web page is extremely simple. You just have to write the name of the image on a single line in your file shorty.[page name]. If the image resides in your image folder then it will show up on your web site. Example:
landscape.jpg
wich gives you the picture
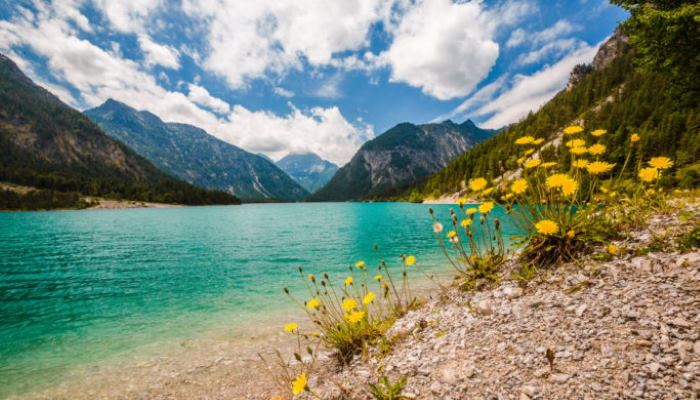
The size of images are 700 pixels
Images are basically of the width 700 pixels and they can be any height. If you make the larger than 700 pixel they will be reduced to 700 pixels before they are shown. If a picture is more than 700 pixel it will be enlarged to 700 pixels width.
The best is to make all images the correct size since larger images just takes longer to load.
Images less than 700 pixels wide
If you want to display a smaller image, you have to prepare an image area which is 700 pixels wide, and place the smaller image wherever you want in that area.
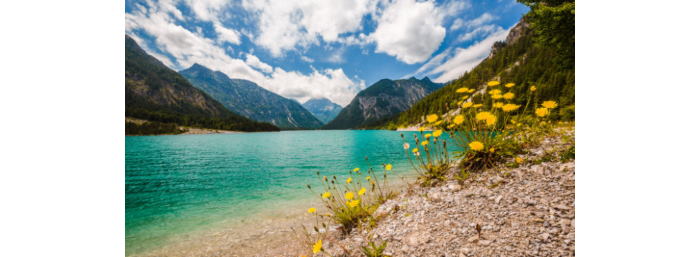
A half page image and text
It is possible to display text to the left and an image to the right if you write the text immediately after the name of the image. Any image will be reduced to half the size and the text appears to the left.
Lorem ipsum dolor sit amet consectetur adipiscing elit aenean vestibulum luctus magnis nam bibendum fringilla, dictumst donec vivamus sed eleifend dictum fusce est orci leo lacus suscipit. Quisque laoreet nec fringilla euismod erat imperdiet dapibus elementum cras.
More than one image on the same row
Several images,(2-4), can be display on the same row by entering their names separated by semicolon.
Example:
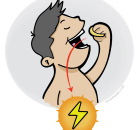
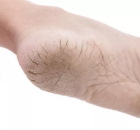
emocional.png;metabol.jpg;fotgrieta.jpg;
If a line of local or remote Internet addresses are writteen on the line after the images, the images will link to those adresses.
Example:
myimage1.jpg;myimage2.png;myimage3.jpg;myimage4.jpg
http://acantiladosmagicos.com;https://piesybienestar.com;https://travelite.es
Please note that a semicolon is neded also after the last image in the row
TEXT
The simplest way of introducing text is jus writing it, line by line. Note that text that you want to be in the same paragraph may not be broken by a carriage return but must be written on the same line.
Inserting head lines and text of various font sizes.
There are five different sizes available for text and you mark them as 1], 2],3], 4] o 5] before the text to the left.
You can also use the sizes 6], 7], 8] o 9], the sizes are the same as size 1-5 but the text will be centered and appear in blue colour.
The text above has no marker. If you want a maker it has to be in the first position to the left.
6]Lorem ipsum dolor sit amet, consectetur adipiscing elit
Lorem ipsum dolor sit amet, consectetur adipiscing elit.
When the marker 6] is in front of the text, the text is displayed in size 6, that is to say it is pretty big. It will also be centered and displayed in a blue colour.
Size 1
Size 2
Size 3
Size 4
Size 5
Size 6
Size 7
Size 8
Size 9
This is the text size if you don't put any marker 1] ... -9] before the text.
You can also place lines of text, or images, in a hidden field by marking the line with [+D] immediately followed by the text you want to display above the hidden field.
The hidden field is ended with [-D]
Example:
[+D]This is my hidden field
This text is displayed when the field is opened
[-D](This terminates the field)
[+] This is my hidden field
LINKS
A menu is automatically generated from your big headlines.
The menu is opened by clicking the white lines in the upper left corner of the page. All the headlines, except the smallest ones are listed there and can be clicked to go to the sections named.

As you can see above:
A text can be marked as important by colouring its background
Dividing the page in sections with a line.
A line across the screen is achieved by marking the line with  L
L .
.
Links to a shorty page are https://[yourdomain.com(.es etc)]/yourdomain?id=[pagename(shorty.pagename)]
Varying colour or centering the text.
If you don't mark it otherwise, the text will appear in a soft grey. You can change the colour of the text by marking it with [+V] for green colour, and ending the green text with [-V].
This is a text in green.
This text has a part in green and another part in red. The green part was marked with [+V] and [-V] and the red part with [+R] and [-R]. If you want blu text, the code for that is [+A] and [-A]. The grey of the text can be enhanced to black with [+N] and [-N]. [+Y] and [-Y] can be used in order to achieve a yellow background to text.
This is a black text
The markers for black are [+N] and [-N] and you can use them in order to make a text black and this works as well for a word in the text.
In order to make a text BOLD, the markers [+N] and [-N] should be used,
THIS TEXT IS BLUE
Text can be centered with [+C] and [-C]
This text is centered and is blue
Adding internal or external web pages to the menu.
Observe that these links don't get added to your page but are added to menu which you find as white bars in the upper left corner of the page.
Links to other pages can be added to the menu of the current page by putting [M] before the line like this [M]Link title;Link for example
[M]My other page;https://myotherpage.html
Look at the menu to see some added pages.
Utilizing a payment service you can include payments on your page

BUTTONS
Buttons are a special form of links. The simplest one is just putting an Internet address on a line with a bar | separating the link from the text.
https://[yourlink]|Clicking here will take you somewhere
Clicking here will take you somewhere
You can also put a button row like at the top of this page.
https://kviksajt.com?id=dictionary#SAMPLES|Samples;https://kviksajt.com?id=dictionary#IMAGES|Images;https://kviksajt.com?id=dictionary#TEXT|Text;https://kviksajt.com?id=dictionary#LINKS|Links;http://kviksajt.com?id=dictionary#BUTTONS|Buttons
Samples;https://kviksajt.com?id=dictionary#IMAGES
There can be 2 - 5 buttons in a row. If there is only one link it appears like the blue line button above.
Images can also be used as buttons
If a line of local or remote Internet addresses are written on the line after the images, the images will link to those addresses.
Example:
myimage1.jpg;myimage2.png;myimage3.jpg;myimage4.jpg
http://acantiladosmagicos.com;https://piesybienestar.com;https://travelite.es
FORMS
A form is created with [F] i the first position of a line, followed by a description of the form.
Example:
[F]Register your interest;
You can also specify the action where you want the form to go by separating the info with a bar "|".
[F]Register your interest|https://myserver.com
Values from the form are POSTED to the linked page.
That way, if you create an intermediary page in php or Livecode Server you can get your page to interact with other systems or with a Database.
The fields of the form need to be entered on the lines after that line, followed by a semicolon.
Name;
Email;
Phone;
On the line directly after the fields needs to go the email address where the data of the form should be sent.
[[email protected]]
CREATING A WEBSHOP

1234 Table lamp €29.55

5678 Table lamp €79.50
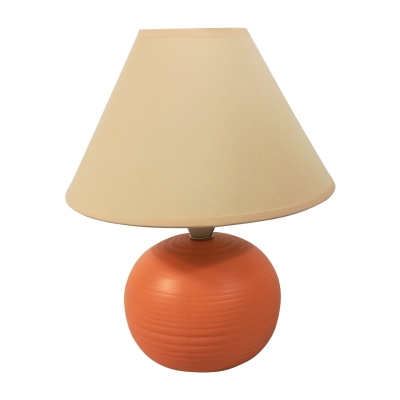
10235 Table lamp €5.0
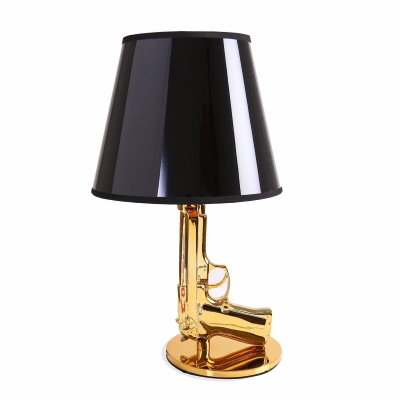
1125 Gun lamp €4500.00
EXTRA
If you want something extra, a function which is not yet available in shorty, you can do that too.
SHORTY accepts HTML code directly. It will of course be more complicated than shorty but if there is something you want to that has not yet been implemented in shorty, you can do it.
This BLOCK is made with HTML
You can see the code below.
<div style='margin-left:auto;margin-right:auto;border:2px solid black;width:400px;height:50px;background-color:#BF5900;font-weight:bold;color:white;text-align:center;line-height:2em;'<This BLOCK is made with HTML</div>
Translation into other languages
A Flag-synbol is place in the upper right corner of all Shorty-pages. Flags fold out when yu hold your mouse on top of that Flag.symbol and it is possible to elect the languages German, English, Swedish and Spanish.
Translated pages should be named the same as the original page followed by a dash and the language-code, de for German, en for English, sv for Swedish and en for Spanish. If you have a page shorty.mypage which is english and you want it in Spanish then you create a translated page shorty.mypage.es
If no translated page is available when you attempt to change language, the page will be translated utilizing the google translation service.
You need a Web server domain in order to run Shorty
I can help you with that if you don't have one
[+] Contact form
SHORTY HTML
Samples;https://kviksajt.com?id=dictionary#FILES
Buttons;https://kviksajt.com?id=dictionary#FORMS
ARE YOU WILLING TO PAY FOR GOOD SERVICE?
I wish this hosting would be completely free of charge, and at the moment it is, but that is not very sustainable so I could charge for the service or finance it with ads. Nobody likes that solution. So if you want to take advantage of this great opportunity to make your web pages quickly and without frying your brain, then please make a donation so that the service can continue.
SAMPLES
The links go to some simple examples made in Shorty HTML
Sample 1;https://kviksajt.com?id=sample2
FILES AND FOLDERS
● Shorty-pages are normal text files named shorty.filename.
● There can be no spaces in shorty file names.
● The first page has the same name as your domain, shorty.yourdomain.
● Shorty is started with an index.html file which you download.
● The index.html file goes to the domain root, (C:/ on Windows).
● Or to a folder C:/yourdomain when your Shorty-pages are secondary.
● There must be a folder [yourdomain].
● In that folder goes the index-file and two other folders.
● A folder image and a folder sound.
● Images go to the image folder, sound files to the sound-folder.
● Duplicate the structure on your server and on your local computer.
● You edit your shorty-pages on your local computer.
● Pages which you edit have to be transferred to the server.
● That can be done automatically with FTP.
[+] Domain info
IMAGES ON YOUR PAGE
Adding images to the web page is extremely simple. You just have to write the name of the image on a single line in your file shorty.[page name]. If the image resides in your image folder then it will show up on your web site. Example:
landscape.jpg
wich gives you the picture
The size of images are 700 pixels
Images are basically of the width 700 pixels and they can be any height. If you make the larger than 700 pixel they will be reduced to 700 pixels before they are shown. If a picture is more than 700 pixel it will be enlarged to 700 pixels width.
The best is to make all images the correct size since larger images just takes longer to load.
Images less than 700 pixels wide
If you want to display a smaller image, you have to prepare an image area which is 700 pixels wide, and place the smaller image wherever you want in that area.
A half page image and text
It is possible to display text to the left and an image to the right if you write the text immediately after the name of the image. Any image will be reduced to half the size and the text appears to the left.
Lorem ipsum dolor sit amet consectetur adipiscing elit aenean vestibulum luctus magnis nam bibendum fringilla, dictumst donec vivamus sed eleifend dictum fusce est orci leo lacus suscipit. Quisque laoreet nec fringilla euismod erat imperdiet dapibus elementum cras.
More than one image on the same row
Several images,(2-4), can be display on the same row by entering their names separated by semicolon.
Example:
emocional.png;metabol.jpg;fotgrieta.jpg;
If a line of local or remote Internet addresses are writteen on the line after the images, the images will link to those adresses.
Example:
myimage1.jpg;myimage2.png;myimage3.jpg;myimage4.jpg
http://acantiladosmagicos.com;https://piesybienestar.com;https://travelite.es
Please note that a semicolon is neded also after the last image in the row
TEXT
The simplest way of introducing text is jus writing it, line by line. Note that text that you want to be in the same paragraph may not be broken by a carriage return but must be written on the same line.
Inserting head lines and text of various font sizes.
There are five different sizes available for text and you mark them as 1], 2],3], 4] o 5] before the text to the left.
You can also use the sizes 6], 7], 8] o 9], the sizes are the same as size 1-5 but the text will be centered and appear in blue colour.
The text above has no marker. If you want a maker it has to be in the first position to the left.
6]Lorem ipsum dolor sit amet, consectetur adipiscing elit
Lorem ipsum dolor sit amet, consectetur adipiscing elit.
When the marker 6] is in front of the text, the text is displayed in size 6, that is to say it is pretty big. It will also be centered and displayed in a blue colour.
Size 1
Size 2
Size 3
Size 4
Size 5
Size 6
Size 7
Size 8
Size 9
This is the text size if you don't put any marker 1] ... -9] before the text.
You can also place lines of text, or images, in a hidden field by marking the line with [+D] immediately followed by the text you want to display above the hidden field.
The hidden field is ended with [-D]
Example:
[+D]This is my hidden field
This text is displayed when the field is opened
[-D](This terminates the field)
[+] This is my hidden field
LINKS
A menu is automatically generated from your big headlines.
The menu is opened by clicking the white lines in the upper left corner of the page. All the headlines, except the smallest ones are listed there and can be clicked to go to the sections named.
As you can see above:
A text can be marked as important by colouring its background
Dividing the page in sections with a line.
A line across the screen is achieved by marking the line with L.
Links to a shorty page are https://[yourdomain.com(.es etc)]/yourdomain?id=[pagename(shorty.pagename)]
Varying colour or centering the text.
If you don't mark it otherwise, the text will appear in a soft grey. You can change the colour of the text by marking it with [+V] for green colour, and ending the green text with [-V].
This is a text in green.
This text has a part in green and another part in red. The green part was marked with [+V] and [-V] and the red part with [+R] and [-R]. If you want blu text, the code for that is [+A] and [-A]. The grey of the text can be enhanced to black with [+N] and [-N]. [+Y] and [-Y] can be used in order to achieve a yellow background to text.
This is a black text
The markers for black are [+N] and [-N] and you can use them in order to make a text black and this works as well for a word in the text.
In order to make a text BOLD, the markers [+N] and [-N] should be used,
THIS TEXT IS BLUE
Text can be centered with [+C] and [-C]
This text is centered and is blue
Adding internal or external web pages to the menu.
Observe that these links don't get added to your page but are added to menu which you find as white bars in the upper left corner of the page.
Links to other pages can be added to the menu of the current page by putting [M] before the line like this [M]Link title;Link for example
[M]My other page;https://myotherpage.html
Look at the menu to see some added pages.
Utilizing a payment service you can include payments on your page
BUTTONS
Buttons are a special form of links. The simplest one is just putting an Internet address on a line with a bar | separating the link from the text.
https://[yourlink]|Clicking here will take you somewhere
Clicking here will take you somewhere
You can also put a button row like at the top of this page.
https://kviksajt.com?id=dictionary#SAMPLES|Samples;https://kviksajt.com?id=dictionary#IMAGES|Images;https://kviksajt.com?id=dictionary#TEXT|Text;https://kviksajt.com?id=dictionary#LINKS|Links;http://kviksajt.com?id=dictionary#BUTTONS|Buttons
Samples;https://kviksajt.com?id=dictionary#IMAGES
There can be 2 - 5 buttons in a row. If there is only one link it appears like the blue line button above.
Images can also be used as buttons
If a line of local or remote Internet addresses are written on the line after the images, the images will link to those addresses.
Example:
myimage1.jpg;myimage2.png;myimage3.jpg;myimage4.jpg
http://acantiladosmagicos.com;https://piesybienestar.com;https://travelite.es
FORMS
A form is created with [F] i the first position of a line, followed by a description of the form.
Example:
[F]Register your interest;
You can also specify the action where you want the form to go by separating the info with a bar "|".
[F]Register your interest|https://myserver.com
Values from the form are POSTED to the linked page.
That way, if you create an intermediary page in php or Livecode Server you can get your page to interact with other systems or with a Database.
The fields of the form need to be entered on the lines after that line, followed by a semicolon.
Name;
Email;
Phone;
On the line directly after the fields needs to go the email address where the data of the form should be sent.
[[email protected]]
CREATING A WEBSHOP
1234 Table lamp €29.55
5678 Table lamp €79.50
10235 Table lamp €5.0
1125 Gun lamp €4500.00
EXTRA
If you want something extra, a function which is not yet available in shorty, you can do that too.
SHORTY accepts HTML code directly. It will of course be more complicated than shorty but if there is something you want to that has not yet been implemented in shorty, you can do it.
This BLOCK is made with HTML
You can see the code below.
<div style='margin-left:auto;margin-right:auto;border:2px solid black;width:400px;height:50px;background-color:#BF5900;font-weight:bold;color:white;text-align:center;line-height:2em;'<This BLOCK is made with HTML</div>
Translation into other languages
A Flag-synbol is place in the upper right corner of all Shorty-pages. Flags fold out when yu hold your mouse on top of that Flag.symbol and it is possible to elect the languages German, English, Swedish and Spanish.
Translated pages should be named the same as the original page followed by a dash and the language-code, de for German, en for English, sv for Swedish and en for Spanish. If you have a page shorty.mypage which is english and you want it in Spanish then you create a translated page shorty.mypage.es
If no translated page is available when you attempt to change language, the page will be translated utilizing the google translation service.
You need a Web server domain in order to run Shorty
I can help you with that if you don't have one
[+] Contact form
ARE YOU WILLING TO PAY FOR GOOD SERVICE?
I wish this hosting would be completely free of charge, and at the moment it is, but that is not very sustainable so I could charge for the service or finance it with ads. Nobody likes that solution. So if you want to take advantage of this great opportunity to make your web pages quickly and without frying your brain, then please make a donation so that the service can continue.
SAMPLES
The links go to some simple examples made in Shorty HTML
FILES AND FOLDERS
● Shorty-pages are normal text files named shorty.filename.
● There can be no spaces in shorty file names.
● The first page has the same name as your domain, shorty.yourdomain.
● Shorty is started with an index.html file which you download.
● The index.html file goes to the domain root, (C:/ on Windows).
● Or to a folder C:/yourdomain when your Shorty-pages are secondary.
● There must be a folder [yourdomain].
● In that folder goes the index-file and two other folders.
● A folder image and a folder sound.
● Images go to the image folder, sound files to the sound-folder.
● Duplicate the structure on your server and on your local computer.
● You edit your shorty-pages on your local computer.
● Pages which you edit have to be transferred to the server.
● That can be done automatically with FTP.
IMAGES ON YOUR PAGE
Adding images to the web page is extremely simple. You just have to write the name of the image on a single line in your file shorty.[page name]. If the image resides in your image folder then it will show up on your web site. Example: landscape.jpg
wich gives you the picture
The size of images are 700 pixels
Images are basically of the width 700 pixels and they can be any height. If you make the larger than 700 pixel they will be reduced to 700 pixels before they are shown. If a picture is more than 700 pixel it will be enlarged to 700 pixels width.
The best is to make all images the correct size since larger images just takes longer to load.
Images less than 700 pixels wide
If you want to display a smaller image, you have to prepare an image area which is 700 pixels wide, and place the smaller image wherever you want in that area.
A half page image and text
It is possible to display text to the left and an image to the right if you write the text immediately after the name of the image. Any image will be reduced to half the size and the text appears to the left.
More than one image on the same row
Several images,(2-4), can be display on the same row by entering their names separated by semicolon.
Example:
emocional.png;metabol.jpg;fotgrieta.jpg;

If a line of local or remote Internet addresses are writteen on the line after the images, the images will link to those adresses.
Example:
myimage1.jpg;myimage2.png;myimage3.jpg;myimage4.jpg
http://acantiladosmagicos.com;https://piesybienestar.com;https://travelite.es


Please note that a semicolon is neded also after the last image in the row
TEXT
The simplest way of introducing text is jus writing it, line by line. Note that text that you want to be in the same paragraph may not be broken by a carriage return but must be written on the same line.
Inserting head lines and text of various font sizes.
There are five different sizes available for text and you mark them as 1], 2],3], 4] o 5] before the text to the left.
You can also use the sizes 6], 7], 8] o 9], the sizes are the same as size 1-5 but the text will be centered and appear in blue colour.
The text above has no marker. If you want a maker it has to be in the first position to the left.
6]Lorem ipsum dolor sit amet, consectetur adipiscing elit
Lorem ipsum dolor sit amet, consectetur adipiscing elit.
When the marker 6] is in front of the text, the text is displayed in size 6, that is to say it is pretty big. It will also be centered and displayed in a blue colour.
Size 1
Size 2
Size 3
Size 4
Size 5
Size 6
Size 7
Size 8
Size 9
This is the text size if you don't put any marker 1] ... -9] before the text.
You can also place lines of text, or images, in a hidden field by marking the line with [+D] immediately followed by the text you want to display above the hidden field.
The hidden field is ended with [-D]
Example:
[+D]This is my hidden field
This text is displayed when the field is opened
[-D](This terminates the field)
LINKS
A menu is automatically generated from your big headlines.
As you can see above:
Dividing the page in sections with a line.
A line across the screen is achieved by marking the line with L.
Links to a shorty page are https://[yourdomain.com(.es etc)]/yourdomain?id=[pagename(shorty.pagename)]
Varying colour or centering the text.
If you don't mark it otherwise, the text will appear in a soft grey. You can change the colour of the text by marking it with [+V] for green colour, and ending the green text with [-V].
This is a text in green.
This text has a part in green and another part in red. The green part was marked with [+V] and [-V] and the red part with [+R] and [-R]. If you want blu text, the code for that is [+A] and [-A]. The grey of the text can be enhanced to black with [+N] and [-N].
This is a black text
The markers for black are [+N] and [-N] and you can use them in order to make a text black and this works as well for a word in the text.
In order to make a text BOLD, the markers [+N] and [-N] should be used,
THIS TEXT IS BLUE
Text can be centered with [+C] and [-C]
Adding internal or external web pages to the menu.
Observe that these links don't get added to your page but are added to menu which you find as white bars in the upper left corner of the page.
Links to other pages can be added to the menu of the current page by putting [M] before the line like this [M]Link title;Link for example
[M]My other page;https://myotherpage.html
Look at the menu to see some added pages.
Utilizing a payment service you can include payments on your page
BUTTONS
Buttons are a special form of links. The simplest one is just putting an Internet address on a line with a bar | separating the link from the text.
https://[yourlink]|Clicking here will take you somewhere
You can also put a button row like at the top of this page.
https://kviksajt.com?id=dictionary#SAMPLES|Samples;https://kviksajt.com?id=dictionary#IMAGES|Images;https://kviksajt.com?id=dictionary#TEXT|Text;https://kviksajt.com?id=dictionary#LINKS|Links;http://kviksajt.com?id=dictionary#BUTTONS|Buttons
There can be 2 - 5 buttons in a row. If there is only one link it appears like the blue line button above.
Images can also be used as buttons
If a line of local or remote Internet addresses are written on the line after the images, the images will link to those addresses.
Example:
myimage1.jpg;myimage2.png;myimage3.jpg;myimage4.jpg
http://acantiladosmagicos.com;https://piesybienestar.com;https://travelite.es
FORMS
A form is created with [F] i the first position of a line, followed by a description of the form. Example:
[F]Register your interest;
You can also specify the action where you want the form to go by separating the info with a bar "|".
[F]Register your interest|https://myserver.com
Values from the form are POSTED to the linked page.
That way, if you create an intermediary page in php or Livecode Server you can get your page to interact with other systems or with a Database.
The fields of the form need to be entered on the lines after that line, followed by a semicolon.
Name;
Email;
Phone;
On the line directly after the fields needs to go the email address where the data of the form should be sent.
[[email protected]]
CREATING A WEBSHOP
EXTRA
If you want something extra, a function which is not yet available in shorty, you can do that too.
SHORTY accepts HTML code directly. It will of course be more complicated than shorty but if there is something you want to that has not yet been implemented in shorty, you can do it.
You can see the code below.
<div style='margin-left:auto;margin-right:auto;border:2px solid black;width:400px;height:50px;background-color:#BF5900;font-weight:bold;color:white;text-align:center;line-height:2em;'<This BLOCK is made with HTML</div>
Translation into other languages
A Flag-synbol is place in the upper right corner of all Shorty-pages. Flags fold out when yu hold your mouse on top of that Flag.symbol and it is possible to elect the languages German, English, Swedish and Spanish.
Translated pages should be named the same as the original page followed by a dash and the language-code, de for German, en for English, sv for Swedish and en for Spanish. If you have a page shorty.mypage which is english and you want it in Spanish then you create a translated page shorty.mypage.es
If no translated page is available when you attempt to change language, the page will be translated utilizing the google translation service.
